
Primo — Guide for Authors
Introduction
Welcome to PRIMO!
Primo is a web-based proofing framework that renders XML files sent by the typesetter into HTML, making it easy for authors to access and edit. For those accustomed to word processors, this tool is straightforward to use, though it comes with a few additional quirks.
By providing extra features which would then help the author to get a glimpse of the final result of the processing, PRIMO ensures a smooth transition throughout the whole proof checking process.
Accessing your article proof

Step-by-step process of accessing the proof
- Step 1: As an author, you will receive an email from the publisher containing a link to the proof of your article.
- Step 2: By clicking on this link, you will be directed to the login page.
- Step 3: Registered Users, simply enter your credentials to sign in and view the proof of your article.
- Step 4: New Users, if you do not have an account, you will need to complete a brief sign-up process. Rest assured, the sign-up is straightforward and will grant you access to your article's proof.
- Step 5: Once you successfully sign-in/sign-up, you will reach the landing page.
- Step 6: Read the instructions in the landing page carefully.
- Step 7: Click on the Proceed button.
- Step 8: Yes, you have landed on the proof page. Now, start proof-reading and making changes.
The detailed instructions are provided in the following sections.
Sign up process
- Initiate Sign-Up: Click the Sign-Up link located at the top-right corner of the login page.
- Enter Your Details: Fill in a valid email address, choose a user ID (use only alphabets), create a strong password (with a mix of letters, numbers, and special characters), and enter your name in the respective fields.
- Complete Sign-Up: After entering the required information, click the Sign-Up button to proceed to the proof page of your article.
- Record Your Credentials: Remember to save your login details securely. In the future, you can access the site using these credentials to sign in.
Landing page

Once you provided the credentials in the required field correctly, then you will be directed to the landing page.
- In the landing page, with
 and
and  placed at the top, you can see a brief info of the article on the left hand side and a part addressing the author as well as a few mandatory steps that need to be kept in mind before submitting the proof on the other side.
 - The
 tab functions to assist the author in making the proof checking process as easy as possible by providing instructions on the various functions and features that are available in the interface.
  can be accessed to get a video tutorial of the interface.
 can be accessed to get Elsevier's author guidelines.
- In order to start the proofing process, click
 to load the PRIMO proof page on the same tab. Alternative, by clicking on the downarrow near the button will provide an option to open the PRIMO proof page on a different tab.


Upon clicking the Proceed button, you will be directed to the PRIMO proofing page. The layout is strategically divided into three sections for optimal navigation:
- Center
- The Main Editor is positioned here, serving as your primary workspace for reviewing and editing your article.
- Left
- The Navigation Panel is located on this side, providing quick access to various sections of your document.
- Right
- The Track Change Panel is situated here, displaying all the Changes, Comments, Warnings, Resources and Info
Recommended Workflow for Authors
The panels and tabs are organized to facilitate a smooth proofing process. Authors are encouraged to follow the sequence outlined below for an efficient review:
- Start with the Navigation Panel: Familiarize yourself with the document's structure and easily jump to different sections.
- Proceed to the Track Change Panel: Address any queries, editorial changes, and comments in the order they appear.
- Utilize the Main Editor: Make necessary revisions directly within your article, leveraging the insights from the other panels.
Note: This structured approach ensures a comprehensive and systematic review of your article before submission.

The Navigation panel serves as your guide through the document's structure, allowing you to swiftly move between different sections. It lists all the key elements such as 'Sections', 'Figures', 'Tables', 'Formulas', 'Supplementary' and 'Others'. All subtabs display their respective contents when clicked. Clicking on any item will directly take you to its location in the document, streamlining your editing process.
Note: While the system is equipped to handle various modifications, it is crucial to limit changes during this stage to those that are absolutely essential.
Front matter tab

The Front matter tab is organised into sub-tabs for Head, Thread, Authors, Abstracts and Keywords, each with its specific purpose. Based on the portion where you want to make the changes, you can make the edits in the associated fields provided within the tab. The author can
- Add short titles, footnotes, dedication.
- Edit the contents in Affiliations/Abstracts/Keywords.
- Edit corresponding author.
- Head
This section is divided into two parts:
- Non-Editable Meta Information: Contains fixed details like JID, AID, Article number, PII, DOI, and Copyright, which cannot be altered by authors.
- Editable Area: Located below the non-editable section, this area is presented in a form layout for ease of editing. Authors may choose to edit here or directly in the central editor. Different versions of titles like 'Subtitle', 'Alt title', 'Short title', 'Footnotes', etc. can be added, deleted or modified in the form mode as well as in the main editing area.
- Authors
-
Author
-
Affiliation
-
Correspondance
-

Footnote


During the proof correction stage, it is generally advised to avoid making changes to author details. Should any critical changes be necessary, they must receive approval from the Journal Manager.
Under the Authors tab we have subtabs for Author, Affiliations, Correspondences and Footnotes.
- Authors: The details of the authors will be detailed there.
- Affiliations: Make necessary adjustments, including the reordering of affiliations. The system will automatically update the affiliation numbers to reflect any changes.
- Correspondences: This section displays the affiliation details of the corresponding author.
- Footnotes: If applicable, this tab will contain a list of all footnotes associated with the article.;
The system does provide the following capabilities:
- Add/Edit/Remove Authors: Manage the list of authors as needed.
- Reorder Authors: Adjust the sequence of authors and switch between given names and surnames.
- Email Addresses: Update or remove existing email addresses, or add new ones.
- Contributor Roles: Define or modify the roles of each contributor.
- Affiliations: Link or update author affiliations.
- Corresponding Author: Designate or change the corresponding author.
- Footnotes: Add new footnotes and delete existing footnotes.
- Abstract tab

Contains the categories of Abstract , Graphical abstract as well as Highlights.
- Editing abstract portion: The edits can be made either in the field within this tab or directly in the main editor.
- Graphical Abstract: Graphical Images uploaded.
- Add/Edit/Remove highlights: Manage them as needed.
- Keywords tab

The keywords in the article will be displayed under this tab.
- Add/Edit/Remove keywords: Manage them as needed.
Body tab

Body comprises the main content of the Article which include Nomenclature, Sections, Conflict of interest, Acknowledgments and Appendices.
Nomenclature

Nomenclature provides the list of abbreviations. Nomenclature details the variables used in the article and its description. It should be inserted just above introduction or after frontmatter.
Sections
Section have options to insert new section, paragraph, credit statement and nested section and paragraph.
We can insert sections and paragraphs anywhere in the Body by clicking on the New tab. We can insert through either the field entry in the Left Panel under Sections tab or directly in the main editor. When we insert new sections and paragraph , the counters in the Article will also change accordingly.
Conflict of Interest
We can enter the details of Declaration of competing interest. The standard format is The authors declare that they have no known competing financial interest or personal relationships that could have appeared to influence the work reported in this paper.
Acknowledgements
This details of the Grant Sponsor and the Grant number associated with the Grant Sponsor will be displayed under Acknowledgements.
Appendices/ Supplementary Material

Electronic components (e-components, multimedia components) and other supplementary material not intended for publication in the paper product, or the Web version of the PDF, can be captured within appendices or in the main body of the text, depending on how the author has treated this material.
Back matter tab
Back Matter tab consists of subtabs for Data availability, Bibliography, Further reading, Glossary and Biography.

Data Availability
This section documents the accessibility of core research assets—such as raw data, analysis code, and protocols—supporting research integrity, validation, and scientific inquiry. In the final PDF output, the Data Availability section will appear immediately preceding the References.
How to Add Data Availability
- Navigate to the Back matter tab. Click the + icon beneath the tab.
- Select Data availability from the drop-down menu.
- In the left panel, locate the Title and Text fields:
- Enter Data Availability in the Title field.
- Enter the required content in the Text field.
The section will automatically be reflected in the Main editor and the generated PDF.
How to Hyperlink a Dataset Link
To make a dataset link-able within the Data Availability section, follow these steps:
- Highlight the desired text (the dataset link) within the section.
- Navigate to the Insert menu in the toolbar.
- Select Hyperref and then click Interref from the drop-down menu.
- In the Inter-Ref (Link) window that appears, paste or type the URL into the URL field. Then click OK.
The selected text is now hyperlinked.
Bibliography/References
When we click on the Bibliography section, we will see the references in the article listed. There is a new  tab, which when clicked ,a window will pop-up.Click on the insert-new bib reference and the fields to enter will be generated in the Left Panel. See the below figure for the details of how to add a new reference.
-
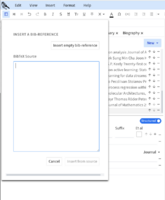
Click on new
 under reference and this window pops-up.We have to click on the Insert empty bib-reference.
-
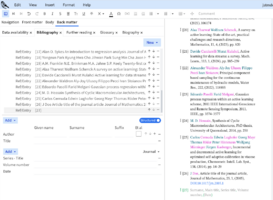
The Left Panel Fields to be filled in will appear, the same fields will be reflected in the Main Editor.
-
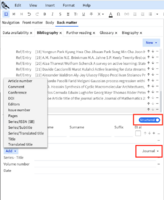
The Structured field is Journal and the entries in the Left Panel are related to Journal.You can add more fields by clicking the Add tab.
-
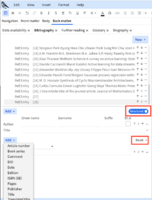
The Structured field is Book and the entries in the Left Panel are related to Book. You can add more fields by clicking the Add tab.
-
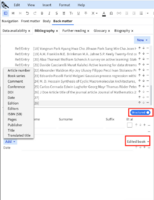
The Structured field is Edited book and the entries in the Left Panel are related to Edited Book. You can add more fields by clicking the Add tab.


The tail part of the article contains the bibliography data which might appear very difficult to edit. But, it’s simply making the changes in the right area.
- Helpful facts: Knowing a few facts which would make it more easy for you to make the necessary changes in Primo.
- There are different tabs visible when you click on the Back matter. These are all created as part of the Elsevier style that we are currently following. So, what you need to do is enter the relevant details in the specified fields and they will all be reflected in the main editor in the correct order. This makes it easy to cross check them.
- There are both structured as well as unstructured format that we can follow through in Primo. Currently, we have structured templates for Journal, book and Edited-book format. For other types of references, we can proceed with the unstructured format. By default, the reference is set in structured format.
- Reorder the reference list: Arrow marks seen at the end of each reference entry
 to be utilised to make the change, if deemed necessary.
 - Add/Edit/Remove reference details: Journal, book or edited-book details can all be managed as necessary in the respective fields made available in the provided template.

- In order to add a new reference entry, you can make use of the
 option seen on the top of the existing reference entries. Clicking on this triggers difference options such as Reference from BibTex source, Empty reference and Entry (nested). You may proceed based on the available data.
 - Editing any of the entries is possible. It can be done directly on the associated part in the main editor or in the related section displayed in the Back matter panel.
- For removing a specific entry from the list, simply click on the '-' option seen among . Another method is to directly remove it in the main editor.

Entry (nested)
To add a nested entry to an existing reference we have to follow the below steps.
- Step 1: Select the Reference we have to add the nested entry and click on the New tab. We will see an option for Entry(nested).Click it.
- Step 2: We will see a new field entry below the Reference.
- Step 3: Add the details of the Reference as we normally do in the left panel. It will be reflected in the Main Editor and PDF.
-
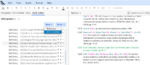
Entry(nested)
-
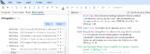
New field entry in left panel and main editor
-
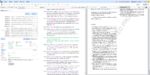
Details entered in left panel and reflected in the main editor and PDF


 option are seen in two locations. Clicking on the first gives the provision of including new author, collaboration, comment,contribution, ellipsis, host, note, subtitle and translated title. Based on the available details to be added, depending on the categories journal, book and edited book, further data can be recorded in the second button.

- Editing platform: Either in the main editor or in the designated fields within the Back matter tab.
Keep in mind that all fields provided within the tabs are not mandatory. Therefore, go through each of the fields that are made available within these tabs and enter or edit the details that is available.
- If you need to add a new reference entry that doesn't have a specific template in Primo, then you can make use of the unstructured format.
- Step 1: Create a new reference using the New option above the reference list.
- Step 2: Select and ensure that Unstructured is highlighted in the page
 .
. - Step 3: The layout will change as result of opting for this. You need to focus only on changing the label according to the reference style and to insert the reference details without concerning about the order.

Further Reading
Any references listed in the bibliography that are not cited within the article can be moved to the Further reading. Authors can also add additional references to Further reading.

Glossary
Glossary lists the used abbreviated forms and its expansion in the article. Glossary list will appear after the Reference List.
Biography
Biography often include a concise overview of an author's background, professional milestones, notable achievements etc. It will appear at the end of the document.

Track change panel
The track change panel, located on the right-hand side of the main editor, is an essential tool for authors during the proofing process. See the below Images for the tabs under Right Panel.
-
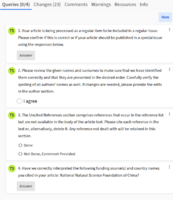
Queries
-
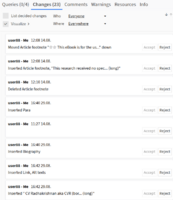
Changes
-
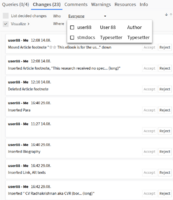
Changes-Who
-
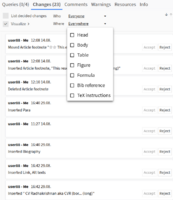
Changes-Where
-
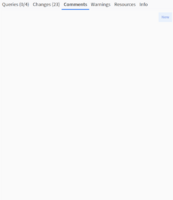
Comments
-
-
Assets
-
Stripins
-
Attachments
-
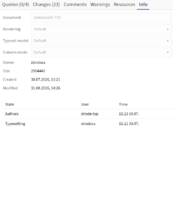
Info


Queries
Start with the Queries tab to address any mandatory questions posed by the editors. These queries must be answered prior to submitting your proof.
Changes
Review the edits suggested by the language-editor or copy-editor. Each change is accompanied by 'Accept' or 'Reject' options, allowing you to decide whether to incorporate the suggested edits. Changes from the copy-editor are marked with 'CE', while your own changes will bear the initials from your login name.
Exploring more features of the Changes tab
- List decided changes
- Once you accept changes made by the copy-editor, they will no longer be visible in the track change tab. To review the changes you've accepted, enable the 'List Decided Changes' option, which will display all the edits you've accepted.
- Visualize
- This feature allows you to categorize and view changes based on::
- Made by yourself
- Made by others
- Decided by yourself (Your accepted changes)
- Decided by others (Others' accepted changes)
- Who/Everyone
- Use this filter to view changes made by a specific contributor or by everyone involved in the document.
- Where/Everywhere
- This function lets you focus on changes made to specific sections of the document, such as the front matter, figures, tables, equations, and more.
Comments
Use this tab to communicate any additional changes you'd like the typesetters to make on your behalf.
Resources
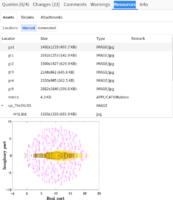
Assets
This tab displays all figures and supplementary materials linked to your article. For fast-rendering and using low band-width, the low-resolution images are shown within the editor, but you can view the high-resolution versions in the Assets tab.
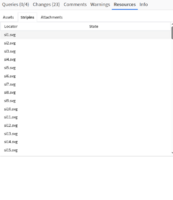
Stripins
Stripins are mathematical images of equations in the article.
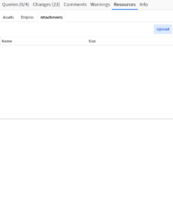
Attachments
The Attachments tab display all the figures, graphical abstracts and multimedia component entered in the Article.
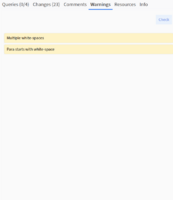
Warnings
Any critical issues or deviations from the journal's guidelines, such as exceeding the allowed number of keywords, unreferenced bib etc will trigger warnings here.
Info
The Info tab details about all the information about the article.
Main editing area
Your article will be rendered in full in this area in HTML format with underlying XML. Whatever changes you make will be carried out automatically in the underlying XML from which the final PDF of your article is produced in web, print or any other format as required. To help you editing, there are two menu bars available — primary and secondary.
The primary one includes 
Edit
The features includes standard editing tools like cut, copy, paste, select all, find, replace, undo, and redo; there is no need to explain their usage, as they are common to all editors.
View

In this menu, you can control how to view the main page.
- Editor option is enabled by default
- Left panel, Right panel and PDF can be enabled as per your convenience.
Insert
This is a contextual menu. You can insert different elements if the document structure allows to. The listing of possible elements in the menu depends on where your cursor is at present.
- For example: Only in the abstract field, you will find options to insert Author Abstract,Graphical abstract and Highlights.

Format
Allows to Format your text. i.e., bold, italic, monospace, etc.
The secondary menu includes
 .
.
Text formatting functionalities like (bold, italic, monospace, list etc.) are placed directly here in the secondary menu for quick access. So these does not need an explanation. However, there are some other features too which needs explanation.
- Toggle navigation panel
- Go to previous position
- Go to next position
- Undo
- Redo
- Insert special characters
- Non-breaking space (tie-up strings). Block two adjacent strings and press this button.
- Level-up (eg. change subsection to section)
- Level-down (eg. change section subsection)
- Bullets
- Numbering
- Move an object (equation, figure, table) here (first you have to select "Move" in that environment and use this.)
- Display PDF version of the article.
- Toggle change panel.
Options tab in Main Editor
The Options tab in the top-left corner of the Main Editor allows you to toggle between different PDF viewing modes. This option appears only when 'PDF' is selected within the view options.

- Browser: The Browser version is the default version of the Article.
- Proof: The Proof version when clicked will display the Proof PDF.
- Web: The Web version of the PDF will be displayed when we click on the Web option.
- Print: The Print version of the PDF will be displayed.
- Grid: Grid option when clicked in different versions will display the PDF with Grid.
- Tracked Changes: All the tracked changes in the Article will be displayed in the PDF when this option is clicked.
- Use XSL
- Auto Update on Edit: This option will be on default, where any edits made in the Article will be automatically updated in the PDF. If we untick this option the PDF will not be upto date.
- Report Problem: The Report Problem option when clicked, a window will appear. We can describe the problem and click on the Report button. The problem will be reported to the technical team and appropriate action will be taken to resolve it.
Head
Corresponding Author
The author to whom the communications regarding the file is addressed is the corresponding author. Usually the corresponding author is indicated by a '*' symbol followed by a footnote `corresponding author'.
Corresponding author is when there is only one author and one corresponding address affiliated to him. Corresponding authors is when there is more than one author with single affiliation.
| No. of authors | No. of corresponding authors | Affiliation of corresponding author | Out put |
|---|---|---|---|
| Multiple | Single | Single | Corresponding author. |
| Multiple | Two | Each with single affiliations | Corresponding authors. |
| Multiple | Multiple | Each with multiple affiliations | Corresponding author at: Affiliation. |
| Multiple | Single | Multiple | Corresponding author at: Affiliation. |
| Multiple | Single | Multiple affiliation that is not the corresponding affiliation | Correspondence to: Affiliation |
| Single author | Single author | Multiple affiliations but single corresponding affiliation | Correspondence to: Affiliation |
When a different affiliation is added other than an already existing affiliations we use Correspondence to.
-
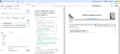
Corresponding author given to multiple authors and multiple affiliations
-
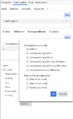
Corresponding author options display list
-
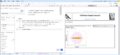
Corresponding author linked to an affiliation.
-
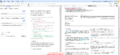
Two corresponding authors with different affiliations.


Affiliation
In Primo we can access the Affiliations under the Front matter on Left Panel. Under the Front matter there is Authors tab.The Second sub tab is Affiliations. The list of Affiliations in the article will be displayed here. We can select each Affiliation and the correspond field/text entries will be displayed in the lower panel. We can make edits in the field entries of each Affiliation selected.
In an Affiliation the following details are essential.
- Tags:
- organization
- address line
- city
- state
- pin code
- country
To add a new entry, under the Affiliations sub tab (Picture) there is a New tab which when clicked will display a field entry for the new affiliation to be added in the below list. We can click on the new field entry in the list and the lower panel will show all the text fields to be entered for New Affiliation.(Picture).
We can change the order of authors by using the up and down arrow key on the right side.(Picture) The changes will be reflected in the Main Editor simultaneously.
Abstract
An abstract is a brief summary of a research article, thesis, review, conference proceeding, or any in-depth analysis of a particular subject and is often used to help the reader quickly ascertain the paper’s purpose. In Primo, Abstracts are displayed in the Left Panel under Front matter. In the Left Panel itself we can add new Abstracts by clicking on the New button

Front matter > Abstracts > > Author Abstract
Body
Nomenclature
To insert Nomenclature in Primo, place the cursor on the first line of Introduction and then do the following
- Step 1: Navigate to the Insert menu and click on Other option.
- Step 2: Select Nomenclature from the drop down. The field entries to insert Nomenclature will reflect both on left panel and main editor.
- Step 3: Insert title, Def. term and Def. description on the field provided in the main editor.
- In the Title that appears in the main editor, insert the title you wish to use. For Eg. Nomenclature, List of Symbols etc.
- Enter the term on 'Def. term'. Eg: T
- Enter the description of the term on Def. description field in the main editor. Eg Temperature.
- Step 4: Press the Enter key and continue inserting terms and definitions. This will be reflected in Left panel as well as on PDF.
Inserting Nomenclature through Left panel
The steps to insert Nomenclature through Left panel is as follows
- Step 1: Click on the Body tab and then click on the + icon under it.
- Step 2: Select Nomenclature from the drop down.
- Step 3: Follow the Step 3 in [Inserting_Nomenclature_through_Insert_menu|Inserting Nomenclature through Insert menu]
- Step 4: To insert a new term, click on the New tab and select Term from the dropdown. The field entries will reflect on Main editor, Left panel and PDF.
List
Definition List
To add a Definition List.
- Step 1: Select the Definition list option from Insert menu.
- Step 2: We can add the Definition term and Definition Description in the editor panel.
- Step 3: It will be reflected in the Main Editor and PDF.
-
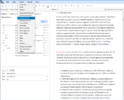
Insert ---> Definition List
-
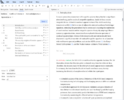
Def term and Def description
-
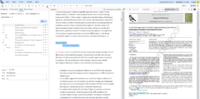
Definition list in Main Editor and PDF


Normal List
To add a Normal List.
Step 1: Select the list option from Insert menu.
Step 2: We can add the first list item in editor panel and for the next one we can press enter key.
Step 3: If we want the 2nd item as sub item, we can click on Increase Indent option from secondary menu.
Step 4: Once we enter the list items we can change the numbering by selecting the numbering option from secondary menu.
Step 5: It will be reflected in the Main Editor and PDF.
Step 6: If we want to add unnumbered list we can add the same as before and for make it as unnumbered select the Bullet option from secondary menu.
Step 7: In the bullet option we can select the bullet styles from the list.
Step 8: It will be reflected in the Main Editor and PDF.
Step 9: If we want to add the new bullet style for a existing unnumbered list click on the Bullet option from secondary menu in that select the option more bullets.
Step 10: While click on the more bullets option bullets and numbering window will appear from that window we can enter new style in the formate field and click OK.
Step 11: It will be reflected in the Main Editor and PDF.


Footnotes
How to add Title Footnote?
Place the cursor at the end of the article title and then do the following
Step 1 In the left panel, navigate to the Head sub-tab within the Front matter section.
Step 2 Enter the required footnote in the Footnotes field that appears.
To add multiple footnotes, click the + icon next to the footnote field. Please note the following indicators:
- First footnote: Closed asterisk symbol (*)
- Second footnote: Two closed asterisk symbols (**)
- Third footnote: Open asterisk symbol
How to Remove Footnote?
- Click on the - button available besides the footnote.
How to add Author Footnote
- Click on Authors sub-tab under the Front matter tab. All authors will be listed there.
- Select the author you want to assign footnote and navigate on Footnotes tab.
- Click on the New button, a blank field to enter footnote will appear. Enter the required footnote. Eg: Currently working with Oxford university.
- The footnote will be reflected on Left panel and also in main editor under label 1.
To link the footnote to an author
- Click on the Author sub-tab and select the author to whom the footnote needs to be assigned.
Textbox

Text box feature is included so as to present a figure, table, equations etc without any breaking and as a single character. It is incorporated into Primo and can be utilised using just a few steps.
- Identify the area and make a click where you want to insert the text box.
- Click on the [Insert] tab in the primary bar, then [Floats] and from there, select [Text Box] from the options available.
- You can now see the text box field successfully created in the main editor.
- In order to inside the content within the box, make a click inside the box and again click on the [Insert] option in the primary menu bar.
- This time, opt for [Display] option and based on the element you're planning to add, select them from the available options provided.
-
![Click on the [Insert] tab in the primary bar, then [Floats] and from there, select [Text Box] from the options available. The Text box field in the Main Editor.](/images/thumb/f/fb/Textboxfloattextbox.png/120px-Textboxfloattextbox.png)
Click on the [Insert] tab in the primary bar, then [Floats] and from there, select [Text Box] from the options available. The Text box field in the Main Editor.
-
![Click on the [Insert] tab in the primary bar, then Display and select the options available.](/images/thumb/8/89/TextboxDisplay.png/120px-TextboxDisplay.png)
Click on the [Insert] tab in the primary bar, then Display and select the options available.
-
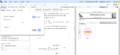
For eg:If formula is selected from the option, this box will appear and we can enter the formula to be displayed in the Textbox.
![Click on the [Insert] tab in the primary bar, then [Floats] and from there, select [Text Box] from the options available. The Text box field in the Main Editor.](/wiki/File:Textboxfloattextbox.png)
![Click on the [Insert] tab in the primary bar, then Display and select the options available.](/wiki/File:TextboxDisplay.png)

Cross reference
One of the notable features incorporated into Primo is the easiness with which you can add or edit a cross reference. It is no longer a tiresome or troubling task. Let's see how it can be done.
- Adding a new cross reference

Step 1: Just click on the space where you want to insert the cross-ref and you can add new cross refs by using the Hyper ref tab in [Insert] as shown in the figure.
Step 2:Clicking on this results in the opening of a new pop-up window. All the portions that can be cross referenced will be displayed in this window.
Step 3:Identify the portion to be referenced from the window and select them. Clicking once more on the same deselects them.
Step 4:As you make the selection, associated string and counter which will appear as the label in the article will be displayed in the top portion. Ensure that the correct label is displayed in the box available there.
Note: You can add multiple targets to be cross referenced within a single label.
Step 5:Then click [OK] to proceed. You can now see the result in the HTML editor.
- 'Editing an existing cross ref
If what you want is to change the already cross-referenced portion in the article, then just click on the specified cross-ref and you can see two options being displayed on the screen.

Then select the [Edit] option and delete or add the one that you need to cross-ref from the options available. Then click [OK] to proceed.
Math
Editing the existing formulas or equations

- In order to edit an equation displayed in the proof, simply click on the concerned equation. This will result in the opening of a pop up menu as seen above.
- If you are a LaTeX user, then you can, with ease, directly edit the data. If not, select the [Toggle virtual keyboard] tab displayed near the menu option in the pop up window.
- Make the changes you need in the equation part visible within the box and then click [OK] to complete the task. You can see the now edited equation displayed clearly in the interface.
Adding new equations or formulas in the article
Step 1: First you need to identify where you want to create the new equation in the main editor.
Step 2: Once that's found, make a click and proceed to select the [Insert] option in the primary menu bar.
Step 3: Among features available, you can see [Math] option. Select this option.
It's also possible to add a new equation or formula using the existing ones also.

- You can insert a new formula by clicking the 3 dots appearing in the left of the equation number and click on [Insert after] or [Insert before] (depending on where we want to insert the new equation).
- Then find the [Formula] tab from options.
- Clicking on the [Formula] leads to the opening of the formula tab.
- Just as we did for editing the existing formula, if you are able to, you can directly note down the LaTeX commands for the new formula. If not, then select the [Toggle Virtual Keyboard] and type in the new formula.
- Finally, click [OK] to finish the task.
Adding subequations in the article
Step 1: First you need to identify where you want to create the new subequation in the main editor.
Step 2: Now navigate to the [Insert] option in the primary menu bar. Then select the [Formula] from the [Display] option.
Step 3: Insert Formula window pops-up where we can select the [Options] and insert the TeX code of the formula.
Step 4: The Formula inserted will be displayed in the main editor with a sequential counter.
Step 5: To change the label we must click on the counter of the subequation and a Bullets and Numbering window will pop-up.
Step 6: In the default Automatic tab, we can add the $a to the existing label($n), displayed as ($n$a). The change will be reflected there.
Step 7: In Primo, the interface by default asks for prompt to change all the equation counters with the same format. If it's not required, we can click on the [Cancel] button. The changes will be reflected in the PDF.
It's also possible to add a new subequations in the existing equations.


Table
How To insert a Table?
Place the cursor on the position where you wish to insert a table
- Step 1: Navigate to Insert menu. Click on the Float option and select Table from the list.
A window will popup to enter the table features.
- Step 2: Insert the caption of the Table in the Caption field provided. The number of Column and Rows can also be inserted in the respective fields provided.
- Step 3: To insert the Header, click on the box next to head.
- Step 4: To format the Table Frame, select the required option from the drop down besides the Frame field.
- Step 5: The options to add Column separator, Row separator and Page-wide option are also available. Check the box besides the required field to enable the feature.
The Table will appear in the main editor.
- Step 6: Click on the respective cell and add data in each cell.
To edit the Table, click on the ellipses besides the Table caption and select or un-select the required option as per requirement.
How To Add Rows and column in a Table?
To add a new row:
- Right click on the row above which you wish to insert the new row. Select Insert from the options available.
- Select Row above to insert a new row above the required row.
- Select Row below to insert a new row below the required row.
To add a new column:
- Right click on the column after which you wish to insert the new column. Select Insert from the options available.
- Select Column left to insert a new column to the left of the existing column.
- Select Column right to insert a new column to the right of the existing column.
How To Add Table Legend?
Step 1: Go to the Table sub-tab under the Navigation tab.
Step 2: A field to enter the legend will be available in the left panel. Add the required legend in the field.
How To Add Table footnote?
- Locate the vertical ellipses (⋮) adjacent to the table in the Main Editor. Navigate to Insert into > Table footnote.
- A footnote entry field will appear in the Main Editor. Once you enter your content, it will automatically populate in the Left Panel, and the footnote marker (a) will appear in the table.
- To add additional footnotes, click the '+' icon within the footnote field. The footnote marker will automatically increment (e.g., to b, c, etc.).
How to cross refer the footnotes into the Table
- Select the text where you want to insert the footnote reference.
- Navigate to the Insert menu, then select Hyper ref > Cross ref(s).
- In the popup window that appears, locate the Table footnote section to view all available footnotes currently in the table.
- Select the desired footnote and click OK to insert the reference.
The footnote will get cross refereed in the Table.
Frequently Asked Question (FAQ)
How to update an author's email address?
To update an author's email address, follow these steps:
- Navigate to the Authors tab located within the Front Matter section of the left panel.
- Choose the appropriate author from the list.
- Locate the E-address field in the details form and update the email address as needed.
How to change the position of the figures?
Changing the figure position is not a nightmare at all now. All you need is to locate the figure that you need to move and an idea of where you need it to be. The position of the figure can be changed within the same page or moved to another page. Let's see how both these can be done in Primo.
- Within the same page.
It should be noted that all the floats will be placed at top by default. Currently, Primo makes it possible to place the top and at the bottom.
- Click on the 3 dots that is seen along the needed figure in the main editor.
- From the features that are displayed, select the TeX float environment.
- In the new pop up window that has appeared as a result of this, you can see the second option as Position.
- Selecting on the down arrow that is made available in the field associated with this, you can find the Top and Bottom options which can be utilised.
- Select on the preferred position from the list, click Save and close the window.
- Check the updated PDF to verify the changes.
- Moving the figure to a different page.

- After identifying the figure, you can find a dotted portion near the figure caption.
- A single click on the dotted area results in laying down the drop down menu which contains several options.
- Select the option [Move] and paste the figure to the desired position either by right clicking there and going for the [Move here] option or directly paste the figure there by using Ctrl+V.
- Cross check with the PDF output and ensure that the you're placing the figure in the correct page.
How to edit the figures?
Editing the figures is not possible as we are including the processed graphical images here. Therefore, if you need to insert or add any new edits to figures, then it's better to proceed to replace the figure with a newly uploaded one.
How to add the enunciations?
To add an enunciation to your document, follow these steps:
- Place your cursor in the main editor at the location where you want to insert the enunciation.
- Select Insert from the menu bar, then choose Enunciation.
- In the pop-up window that appears, select the Type of enunciation and enter Title. The title is optional.
- Click OK to complete the insertion.
Types of Enunciations:
- Italic enunciations: Claims, Conjectures, Corollaries, Lemmas, Properties, Propositions, and Theorems
- Roman enunciations: Algorithms, Assumptions, Axioms, Cases, Definitions, Examples, Hypotheses, Notes, Problems, Proofs, and Remarks

How to add Graphical abstract?
To add a graphical abstract to your document, follow these steps:
Step 1: Create the Graphical Abstract Entry
- Navigate to Front matter and select Abstracts from the sub menu.
- Click the New button under the Abstracts tab.
- Select Graphical abstract from the drop-down menu.
The Graphical abstract field will now appear in the left panel, the Main editor, and the generated PDF.
Step 2: Upload and Insert the Figure
- Navigate to the Insert menu in the toolbar.
- Select Display > Figure.
- In the pop-up window, upload your image file and verify the image in the preview window.
- Click OK to complete the upload.
The uploaded graphical abstract will now be visible in the left panel, the main editor, and the PDF.
-
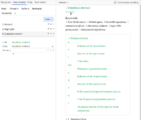
Graphical Abstract title and field entry in Main Editor.
-
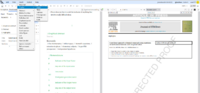
Click on the field entry and navigate to Insert Menu and click on the Display and select the figure option.
-
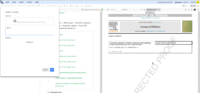
Insert a figure window appears
-
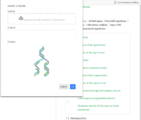
Upload figure and click OK.
-
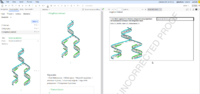
The Graphical Abstract uploaded will be displayed in the Left Panel,Main Editor and PDF as shown here.


How to scale a Graphical abstract figure?
- Do a right click on the image that is to be scaled.
- Select Figure image>TeX pagination. The TeX pagination window will appear.
- Enter 0.15 in the Scale field, the graphical abstract will render correctly in the PDF.
-
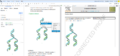
Do a right click on the image that is to be scaled. Select Figure image>TeX pagination.
-
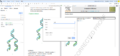
Enter 0.15 in the Scale field.


How to add Highlights?
Step 1: Click on Front matter and then select the Abstracts option available beneath it.
Step 2: Click on the New tab on the right side and choose Author highlights.
Step 3: A new field entry Highlights will opens up in the left panel as well as on the main editor.
Step 4: To enter bullet list, click on the Bullet ON/OFF  icon available in the secondary menu. Select Bullets
  from the drop down list.
Step 5: Enter the first item of the highlight and then press Enter to insert the second item of the list. Keep doing so to insert the required number of items. It is advised to limit the count between 3 to 5 bullet points.
Credit statement in Primo
Different authors would have contributed in different ways to the creation of an article. There are standard as well as non-standard roles created to signify this purpose. This content can be edited as per the authors’ choice by clicking on this section in the HTML viewer and making the changes directly there.
How to generate CRediT authorship contribution statement?
Step 1: Place the cursor at the end of the Conclusion section in the Main editor.
Step 2: Navigate to the Insert menu. Select the Credit statement from the drop down.
The section CRediT authorship contribution statement will get generated in Main editor.


How to add contribution to each author?
Step 1: Navigate to the Front matter and select Authors. All authors in the article will be listed.
Step 2: Select the specific author to whom the credit needs to be assigned.
Step 3: Locate the Contributor roles section in the lower panel.
Step 4: Click on the New tab to add the standard credit roles.
The entered roles will be listed under the contributor role of each selected author. The same will get reflected in PDF under the section CRediT authorship contribution statement.
-
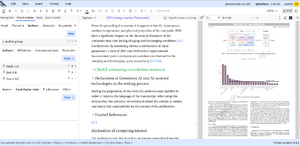
Navigate to the Front matter and select Authors. All authors in the article will be listed.
-
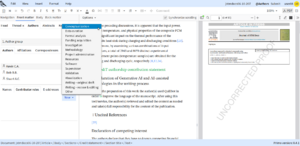
Select the specific author to whom the credit needs to be assigned. Locate the Contributor roles section in the lower panel. Click on the New tab to add the standard credit roles.
-
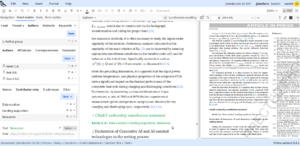
The changes will be reflected in Main editor and PDF.


Declaration of Conflicting Interest (DoCI)

How to insert DoCI statement
Step 1: Move the cursor to the last item in the section prior to the Acknowledgments.
Step 2: Go to the Insert menu, select Section, and then choose the Section option from the dropdown. Insert a section window will pop up.
Step 3: Untick the Label option as DOCI is an unnumbered section. Add title as Declaration of competing interest and then click OK. The title will get displayed in main editor.
Step 4: To set the role to "conflict-of-interest", navigate to the bottom-left panel, locate the Role dropdown menu, and select conflict-of-interest.
Step 5: Add the required text under the section.
The changes will be reflected in Main editor and PDF.
How to edit DoCI statement
- Locate DOCI section using the Navigation tab.
- Just edit it as we do in any word processor.
Grant Sponsor
How to add a new funding source?
The funding details such as the grant sponsors and grant numbers are included in the Acknowledgements section found above to the reference part. The procedure to insert grant sponsor and grant number is explained below.
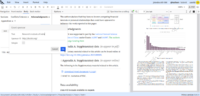
- Place the cursor inside the Acknowledgements section in the main editor.
- Navigate to the Insert menu and select Grant sponsor from the dropdown menu.
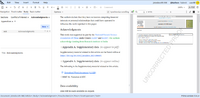
- The Grant sponsor window will appear.
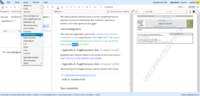
- Enter the grant sponsor's name in the Text field, then click OK. The details will get reflected in main editor.
-
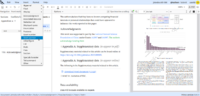
Navigate to the Insert menu and select Grant sponsor from the dropdown menu.
-
The Grant sponsor window will appear. Enter the grant sponsor's name in the Text field, then click OK.
-
The changes will get reflected in main editor.


How to link Grant number to a Grant sponsor
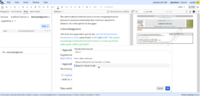
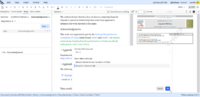
- To include a grant number, type the number and select it.
- Navigate to Insert menu and select Grant number from the drop down. In the pop-up window that appears, select the sponsor associated with the selected grant number.
- After selecting the sponsor, click OK to finish the task.
-
Enter the grant numbers associated with the sponsor and select the Grant number. Navigate to the Insert menu and select Grant number from the drop down menu.
-
Select the sponsor associated with the selected grant number.
-
After selecting the sponsor, click OK to finish the task.


How to add new Appendix section
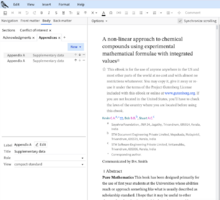
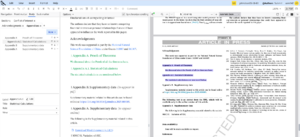
Step 1: Click on the Body tab in the left panel, select Appendices.
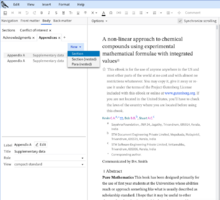
Step 2: We can see a New tab below the Appendices tab and we can select the section option .
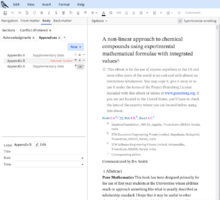
Step 3: When we click on section option new Appendix section will appear as Appendix B. To make it the first Appendix we can click on the "Up Arrow" icon.
Step 4: In the left lower panel we can enter the title, and the same will be reflected in the main editor and we can enter the contents of the appendices in the "Your Text".
Step 5: We can add subsection by selecting Insert---->section---->section through the Insert menu.
Step 6: Now "Insert a section" window pops-up where we can enter the Title and click the "Ok" button.
Step 7: Now the subsection will appear in the main editor and we can enter the contents by clicking on the "Your Text".
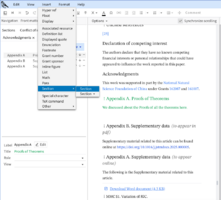
Step 8: We can add new appendix section under the existing one by selecting Insert---->Section---->Section.
Step 9: Now we can see the section countering of appendix for Supplementary data changed, as per DTD we need the same counter for both Supplementary data sections. For that we need to change the countering via click the section counter of the last Supplementary section.
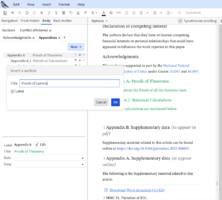
Step 9: We can see the Bullets and numbering window will appear where we can select the "Counting : Start from 1".
Step 10: Now new 3 options appear in the same window in that we can select the option "Implicit" and click "Ok".
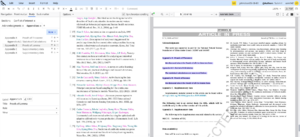
Step 11: We can see the Supplementary sections are having the same counters and all the appendix sections were countered sequentially.
-
step-1
-
step-2
-
step-3
-
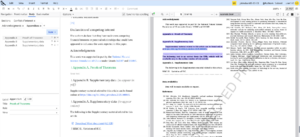
step-4
-
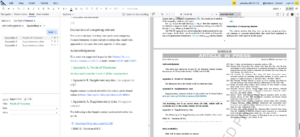
step-5
-
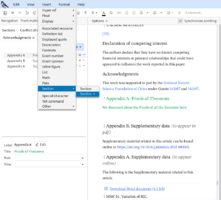
step-6
-
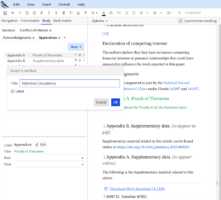
step-7
-
step-8
-
step-9
-
step-10
-
step-11
-
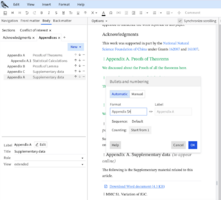
step-12
-
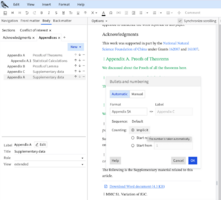
step-13
-
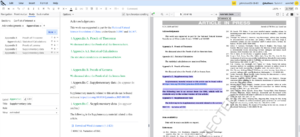
step-14


Supplementary materials
The position of Supplementary material section is just above the reference. To insert a supplementray material section, place the cursor just above the reference section and then do the following
Adding an Appendix
- Navigate to the Insert menu, select Other, and then select Appendices from the sublist.
Appendix A will appear in the Main Editor and Appendices sub tab will appear under Body tab in Left panel.
- In the left panel, set the Title to Supplementary Data.
- To prepare for PDF publication:
- Set the View to compact-standard.
(to appear in PDF) will appear in main editor and PDF. Enter the content in text field in the main editor.
- To prepare for XML publication:
- Under the Appendices tab, click New and select Section.
- In the left panel, set the Title to Supplementary Data.
- Set the View to extended.
(to appear online) will appear in main editor and PDF. Enter the content in text field in the main editor.


How to Upload Supplementary Material
Note that supplementary materials cannot be edited directly in the tool; you can upload a new version to replace existing files.
To upload a new multimedia component/E-component, do the following
- Click on the Insert tab in the toolbar.
- Select E-components from the Display options.
- In the Insert an e-component pop-up window, click Upload to select your file.
- Enter the required caption in the specified field.
- Click OK.
Once uploaded, the type of material attached will be visible in the Preview window, and the attachment will appear in the Main Editor.


Bibliography
Bibliography is a structured list of all the references that were consulted or used while creating a work. Examples of author year and numbered references are provided below.
| Numbered reference | Author year reference |
|---|---|
 |

|
General Instructions
- Click at the end of the reference where you wish to add the new reference.
- By default, the reference will appear as numbered.
- Journal, Edited book, Book are the available reference types.
- To change Book to report, Choose Report in the 'Class' option.
- Fields will vary according to the reference type.
- if you insert a new reference, create source text by clicking on the Generate button.
- Default fields in Journal, Edited book and Book are given below.
| Journal | Book | Edited Book |
|---|---|---|
 |
 |

|
- To add extra details select the required field from Add option and then fill it up.
- The dropdown list in Add menu varies according to the reference type selected.
Inserting different reference types
Bibliography includes various reference types. The procedures for inserting each type are explained below, along with examples.
Article


Now let's break up the reference and list out each item.
- Author name: Antic C
- Article title: Analogical proportions
- Journal title: Ann. Math. Artif. Intell
- Volume: 90
- Year of Publication: 2022
- Page range: 595-644
The image attached below shows the fields to enter these details into Primo.

Use Add button to include extra information.
 |

|
Edited Book
When recording the data of a bib type such as "Edited Book", it involves a slightly different set of details compared to a journal. References with multiple titles usually come under "Edited Book" category. So, lets explain and learn it easier with an example.


Let's list out each part of the bib item for more clarity.
- Author names: Galanter P
- Article title: Generative art theory
- Editor's name: Paul C
- Book title: A companion to Digital Art
- Date of publication: 2016
- Publisher: John Wiley & Sons
- City: Oxford
- Page number: pp. 146-180
Now we just need to add these elements in the correct fields. Refer the image given to understand the correct placement.

Book


Lets break apart the items as we did before.
- Author name: Combs KL
- Book title: Application of Analogical Reasoning for Use in Visual Knowledge Extraction
- Publisher: Wright State University. OhioLINK: Electronic Theses and Dissertation Center
- Date of Publication: 2021
Now, lets add the details in the primo!!

Bibliography through Left Panel
Step 1: Identify where you want to insert the new reference in the main editor. Once that is confirmed, keep the cursor on that point in the reference section of article and navigate to the Left Panel.
Step 3: On the Left Panel, under the tab Backmatter we will find Bibliography. Click on that tab and the References in the Article will be listed.
Step 4: The cursor position will be reflected and the Reference will be highlighted in the Left Panel.
Step 5: We have to click on the New tab and select the Reference Option.
Step 6: A window with 'Insert empty bib-reference' option with appear, click on it and the fields to enter the new reference details has been created.
Step 7: We have to enter details through the given field entries in the Left Panel. They will be populated in the Main Editor and PDF.
- Kindly note that reference style set in Primo is numbered by default. You can change it any time.
-
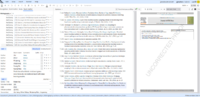
Identify the position where you wish to add the new reference.
-
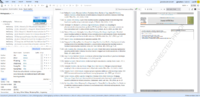
Navigate to New button. Select Reference from the drop down.
-
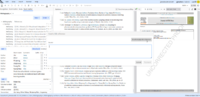
Click on Insert empty bib-reference in the top right of the pop up window.
-
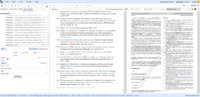
An empty bib will appear in the main editor and a Form will appear in left panel. Add required details.
-
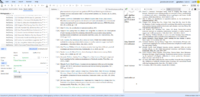
Add the required details.
-
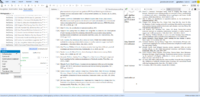
To add extra details, click on Add button, select the required data and then fill the form.
-
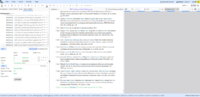
-
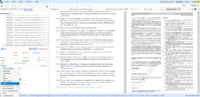
-
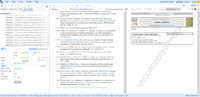
-
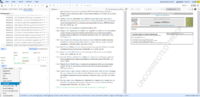
-
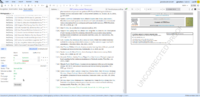
-
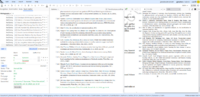
Click on Generate button to generate the ref source.
-
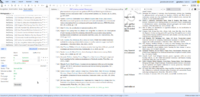
-
-
The reference will get updated in main editor and PDF.


How to add a new reference using bibTeX source?
Step 1: Navigate to Back matter in Left panel. Select Bibliography. Identify the position where you wish to add the new reference and click at its end.
Step 2: Navigate to New button. Select Reference from the drop down.
Step 3: Insert a bib-reference window will pops up. Insert bibTeX source in the box available. Click on Try insert button.
Step 4: Check the preview available and then click Insert.
Step 4: Click on Generate button to create the ref source.
The reference entered will be reflected in Main editor and PDF.
-
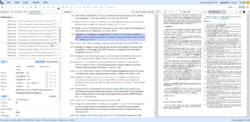
Navigate to Back matter in Left panel. Select Bibliography. Identify the position where you wish to add the new reference.
-
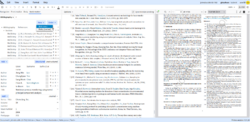
Navigate to New button. Select Reference from the drop down.
-
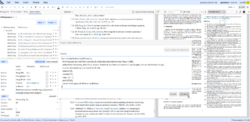
Insert a bib-reference window will pops up. Insert bibTeX source in the box available. Click on Try insert button.
-
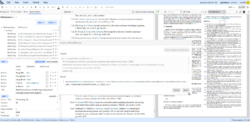
Check the preview available and then click Insert.
-
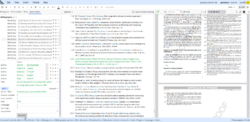
Click on Generate button to generate the ref source.
-
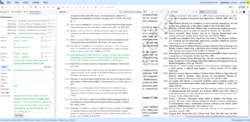
The reference entered will be reflected in Main editor and PDF.


How to add a new reference using form in text mode?
Step 1: Identify the position where you wish to add the new reference.
Step 2: Navigate to New button. Select Reference from the drop down. Insert a bib-reference window will pops up.
Step 3: Insert the required reference in text mode, ie, in the same format that it appears in reference list. Then click Try insert
Step 4: Check the preview available and then click insert.
Step 5: Click on Generate button to generate the ref source.
The reference entered will be reflected in Main editor and PDF.
-
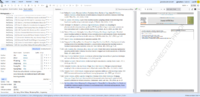
Identify the position where you wish to add the new reference.
-
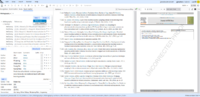
Navigate to New button. Select Reference from the drop down.
-
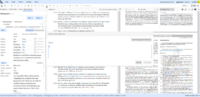
Insert a bib-reference window will pops up.
-
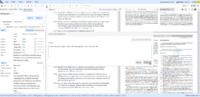
Insert the required reference in text mode, ie, in the same format that it appears in reference list. Then click Try insert
-
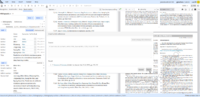
Check the preview available and then click insert.
-
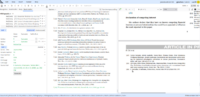
Click on Generate button to generate the ref source. Reference entered will be reflected in Main editor and PDF.


How to add a new Author year Reference in Primo?
Follow the steps given below to insert and new reference in Primo.
Step 1: Click at the end of the reference, where you wish to add the new reference.
Step 2: Navigate to New button. Select Reference from the drop down
Step 3: Click on Insert empty bib-reference in the top right of the pop up window.
Step 4: An empty bib will appear in the main editor and a Form will appear in left panel. Add required details.
Step 5: Click on Generate button to create the ref source.
By default, the reference will appear in numbered format. To change it to author year do the following
Step 1: Click on the vertical ellipses near the reference. Select Label from the drop down. Bullets and numbering window will pop up.
Step 2: Select Manual option and enter the label in the Label field in acceptable format.
Step 3: Click on OK.
The New reference will appear with the label in author year format.
-
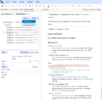
Enter a new reference
-
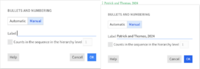
Click on the Manual tab and then we can see the label field blank. Click there and add the label in the prescribed format of Author year.

.png)
How to sort the new reference alphabetically
After inserting the required reference in author year format do the following
- Navigate to the Left panel. Select Order button.
- Select Alphabetically from the drop down.
The reference will now get alphabetically sorted.
Biography
Biography often include a concise overview of an author's background, professional milestones, notable achievements etc. It will appear at the end of the document.
In order to include biography, we need to do the following:
- Step 1: Click on the last entry of the document.
- Step 2: Navigate to the Insert menu, Click on the Other tab and select the option Biography.
The Back matter window will opens up on the left panel. Biography comes under the Back matter tab. An Upload option is available in the lower panel.
- Step 3: Click on the Upload option and select the picture you want to upload. The uploaded picture will be reflected in the Left panel, Main editor and PDF.
- Step 4: The details about the author can be entered in the field available in Main Editor or into the Text field in Left Panel.
-
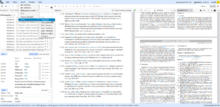
Navigate to Insert menu, Click on the Other tab and select the option Biography.
-
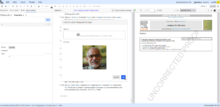
Click on the Upload option and select the picture you want to upload.
-
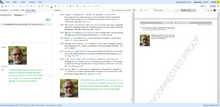
The details about the author can be entered in the field available in Main editor or into the Text field in Left Panel.


How to link Biography to Author?
In Primo, once we entered the author's biography, we have to link it to the author. The steps are explained below with pictures.
Step 1: Navigate to the Authors tab under Front matter.
Step 2: Select the author to whom we wish to link the biography. Select the Other option located in the panel beneath the author list.
Step 3: Go to the Biography field and click on the Edit option near it. A window with the author biography will pop up.
Step 4: Select biography corresponding to the particular author and click on the OK button.
Step 5: The author's name will be highlighted in the PDF. Click on the author's name in the PDF to view their biography.
-
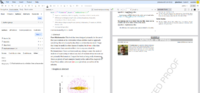
We have to navigate to the Author's tab under front matter.
-
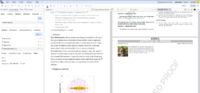
Select the author's name and click on the 'Other' in the lower panel.
-
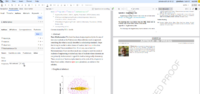
There is a field Biography and an Edit option near it.
-
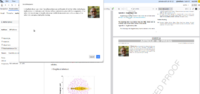
When we click on the edit option, a window with the biographer's detail pop-up as seen above.
-
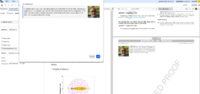
We have to select the biographer's detail and click on the OK button.
-
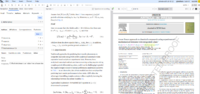
Once we click on OK we will see that the Biographer's field is with the information about the author. The author's name will be highlighted in the PDF.


Glossary
A glossary is an alphabetical list of specialised, technical, or difficult terms along with their definitions, usually found at the end of a book, article, or document.
Step 1: Navigate to the Back matter in the left panel. Click on the + icon next to Bibliography.
Step 2: Select Glossary from the drop down list.
Step 3: Field entries Title and Intro will appear on the Left panel. Insert the required title in the Title field.
Step 4: Clicking on the Entry field under the Glossary tab. Insert the term in the Heading field and definition in the Definition field.
Step 5: To enter a new glossary entry, click on the New option under the Glossary tab, then select on Entry (sibling) from the drop down.
Repeat the steps to add all glossary entries. Glossary will appear after the Reference list.
-
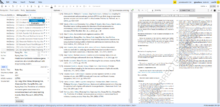
Navigate to the Back matter in the left panel. Select Glossary from the drop down list.
-
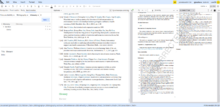
Field entry Title and Intro will appear on the Left panel. Insert the required title in the Title field.
-
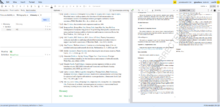
Click on the Entry field under the Glossary tab. Insert the term in Heading field and definition in Definition field.
-
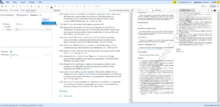
To enter a new glossary entry, click on the New option under the Glossary tab, then select on Entry (sibling) from the drop down.
-
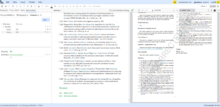
Glossary will get updated in main editor and PDF.


Further Reading
References that appear in the reference list but are not cited or cross-referenced within the article are listed in this section. Such references are not permitted under References; therefore, they must either be cited within the text or moved to the Further Reading section.
How to add Uncited reference to Further reading
To move the uncited references to further reading do the following:
- Step 1: Navigate to Insert menu, click on Other tab. Select Further reading.
- A Further reading title will appear after the reference.
- Step 2: Click on the vertical ellipsis before the uncited reference.
- Step 3: Select Move. Then select To Further reading option from the dropdown.
The reference will be moved to the further reading section.
-
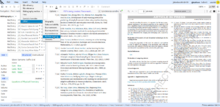
Navigate to Insert menu, click on Other tab. Select Further reading.
-
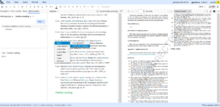
Click on the vertical ellipsis before the uncited reference. Click on To Further reading option on the sub menu.
-
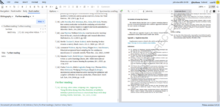
The reference will be moved to the further reading section, This will be reflected in the PDF too.


How to add New reference to Further reading
To add new references to Further reading, follow the following steps
- Step 1: Click on New tab under Further reading.
- Step 2: Select Reference from the drop down.
- Step 3: Insert a bib-reference window pops up. Click on Insert empty bib-reference.
- Step 4: Enter the required details in the form available in Left panel.
The changes will be reflected in main editor and PDF.
-
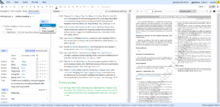
Click on New tab under Further reading. Select Reference from the drop down.
-
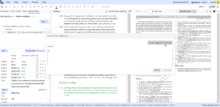
Insert a bib-reference window Pops up. Click on Insert empty bib-reference.
-
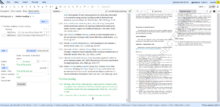
Enter the required details in the form available in Left panel. The changes will get reflected in PDF and main editor


